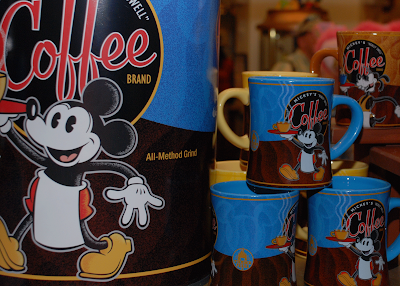
A couple of people actually liked my Wordless Wednesday photograph, so I'm going to explain how I got the final product. We were wandering around one of the shops at Downtown Disney and I was looking for an interesting photo op. I had already taken all of the typical tourist shots of the family.
I spotted the Mickey Coffee can and mug display. I think this will work. I'm using a Nikon D80 digital SLR with an 18-135mm lens. I set this in portrait mode to soften the background. Here is the original photo right out of the camera. It's OK. Nothing special and certainly nothing that would draw your attention. The first thing I did was to crop the photo. Then I went to "Enhance", Auto Smart Fix, and this is the result.
 Next, I went to Enhance, Adjust Color, Adjust Hue/Saturation. That allowed me to pop the blue and red in the photo. Here is the result.
 Finally, I went to Enhance, Adjust Color, Adjust Color Curves, Increase Contrast and this is the result. You get a photo that pops.
 This whole process takes about five minutes. Believe me, if I can do this, anyone can. I am neither a computer geek nor a PhotoShop expert. I just like messing with pictures. Give it try.
Wednesday, July 9, 2008
Fun With PhotoShop (Elements)
Posted by DrillerAA at 9:02 PM
Subscribe to:
Post Comments (Atom)


4 comments:
Excellent account of the simple steps necessary...
I love it. This is just such a cool shot. I had no idea that you had used PhotoShop to enhance the picture. Excellent. Have a great day. :)
I didn't realize it was that easy. That's really cool.
Excellent (and clear) explanation of how to do this thing! I actually understand ;--)
Hugs and blessings,
Post a Comment